Make your Python package PyPI ready - pyproject.toml#
In the installable code lesson, you learned how to add
the bare minimum information to a pyproject.toml file to make it
installable. You then learned how to publish a bare minimum version of your
package to PyPI.
Following that you learned how to add a:
to the root of your project directory.
To enhance the visibility of your package on PyPI and provide more information
about its compatibility with Python versions, project development status, and
project maintainers, you should add additional metadata to your pyproject.toml
file. This
lesson will guide you through the process.
Learning Objectives
In this lesson you will learn:
More about the
pyproject.tomlfile and how it’s used to store different types of metadata about your packageHow to declare information (metadata) about your project to help users find and understand it on PyPI.
If you wish to learn more about the pyproject.toml format, check out this page.
Click for lesson takeaways
When creating your pyproject.toml file, consider the following:
There are only two required metadata tables that you need to install and publish your Python package:
[build-system]
[project].
The [project] table stores your package’s metadata. Within the [project] table, There are only two required fields:
name=
version=
You should add more metadata to the
[project]table as it will make it easier for users to find your project on PyPI. And it will also make it easier for installers to understand how to install your package.When you are adding classifiers to the [project] table, only use valid values from PyPI’s classifier page. An invalid value here will raise an error when you build and publish your package on PyPI.
There is no specific order for tables in the
pyproject.tomlfile. However, fields need to be placed within the correct tables. For examplerequires =always need to be in the [build-system] table.We suggest that you include your [build-system] table at the top of your
pyproject.tomlfile.
What is a pyproject.toml file?#
The pyproject.toml file is a human and machine-readable file that
serves as the primary configuration file for your Python package.
Tip
Building your package is the step that created the distribution files that are required for you to publish to PyPI.
About the .toml format#
The pyproject.toml file is written in TOML format. TOML is an
easy-to-read structure that is based on key/value pairs. Each section in the
pyproject.toml file contains a [table identifier]. The TOML format can be
compared to other structured formats such as .json.
Below you can see the [build-system] table. Within
that table there are two required key/value pairs.
requires = is the key and the value is ["hatchling"] within the [build-system] array specified by square brackets [].
[build-system] # <- This is a table
requires = ["hatchling"]
# The build backend defines the tool that should be used to build your package distribution files.
build-backend = "hatchling.build"
What is the pyproject.toml used for?#
The pyproject.toml file tells your build tool:
What Build backend to use to build your package (we are using Hatchling in this tutorial but there are many others to choose from).
How and where to retrieve your package’s version:
statically where you declare the version
version = "0.1.0"ordynamically where the tool looks to the most recent tag in your history to determine the current version.
What Dependencies your package needs
What versions of Python your package supports (important for your users).
The pyproject.toml file also makes it easy for anyone browsing your GitHub
repository to quickly understand your package’s structure such as:
How your package is built,
What Python versions and operating systems it supports
What it does,
Who maintains it
Finally, the pyproject.toml file is also often used to configure tools such as static type checkers (e.g. mypy) and code formatters/linters (e.g. black, ruff).
Tip
Check out the PyPA documentation if you are interested in setting build configurations for other tools.
Note that some build tools may deviate in how they store project metadata. As such you may want to refer to their documentation if you decide to use a tool other than Hatch and hatchling. We have selected hatchling and hatch as our tool of choice for this tutorial as it adheres to PyPA rules and guidelines.
How is pyproject.toml metadata used?#
The pyproject.toml file is the file that your build tool uses to populate
a METADATA that is included in your Python distribution files that get published to PyPI. This METADATA file is then used by PyPI to populate your package’s PyPI landing page and help users filter through the tens of thousands of packages published there.
When you add the classifier section to your pyproject.toml and your package is built, the build tool organizes the metadata into a format that PyPI can understand and represent on your PyPI landing page. These classifiers also allow users to sort through packages by version of python they support, categories and more.#
Tip
A more in-depth overview of pyproject.toml files
Our guidebook page has a more in depth overview of this file
How to update your pyproject.toml file#
In the last lesson, you created a bare-bones pyproject.toml file that contained the core elements needed to build your package:
A
[build-system]table where you defined your project’s backend build tool (hatchling)A
[project]table where you defined your project’s version and name.
The pyproject.toml file that you created, looked like this:
[build-system]
requires = ["hatchling"]
build-backend = "hatchling.build"

[project]
name = "pyospackage"
version = "0.1.0"
Your next step is to add additional recommended metadata fields that will both help users find your package on PyPI and also better describe the scope of your package. Once you add this metadata, you don’t have to do it again. These metadata fields will only be updated periodically when you do something such as:
drop a package dependency
modify what Python versions your package supports.
More on hatchling
The documentation for the hatchling back-end is here
Step 2: Add README and license#
In the previous lessons, you added both a README.md file and a LICENSE to your package repository. Once you have those files, you can refer to the README from your pyproject.toml file, and add a short code indicating your choice of LICENSE following the example below.
[build-system]
requires = ["hatchling"]
build-backend = "hatchling.build"
[project]
name = "pyospackage"
version = "0.1.0"
description = """
Tools that update the pyOpenSci contributor and review metadata
that is posted on our website
"""
authors = [
  { name = "Firstname Lastname", email = "email@pyopensci.org"},
  { name = "Secondperson Fullname", email = "email2@pyopensci.org" }
]

maintainers = [
  { name = "Secondperson Fullname", email = "email2@pyopensci.org" },
  { name = "New Friend", email = "newbie@pyopensci.org" }
]
readme = "README.md"
license = "MIT"
The license entry in your pyproject.toml file must use the license expression syntax. Often this is a short name (with no spaces) for the license, such as “MIT”, “BSD-3-Clause” or “Apache-2.0”. More precisely, it must be a valid SPDX license expression, as documented in the SPDX specification, either version 2.2 or a later compatible version.
If you have multiple licenses, or a custom license, you can also express these using a license expression.
If you want to distribute license files, or other files containing legal information, with your package, you can include these using the license-files entry, but this is not required.
Step 3: Specify Python version with requires-python#
Add the requires-python field to your pyproject.toml [project] table.
The requires-python field helps pip identify which Python versions that your package supports.
It is set to a single value.
The packaging specification definesrequires-python as a string that uses version specifiers. Most projects will specify the oldest Python version supported by the package. In some advanced cases, an upper bound is set to indicate which future Python versions, if any, will be supported.
But how do I figure out which Python versions I should support?
Good question. The Python developer guide provides a status page (and a handy visualization) that explains the status of each Python release. Python releases go through several different phases that are explained in PEP 602.
We recommend that you use the latest Python release in the bugfix phase. If your Python release is in the security phase, we recommend migrating to a newer version of Python.
SPEC 0 of the Scientific Python project suggests a common schedule for dependencies, including Python release versions, and is also worth considering for your project.
[build-system]
requires = ["hatchling"]
build-backend = "hatchling.build"

[project]
name = "pyospackage"
version = "0.1.0"
description = """
Tools that update the pyOpenSci contributor and review metadata
that is posted on our website
"""
authors = [
  { name = "Firstname Lastname", email = "email@pyopensci.org"},
  { name = "Secondperson Fullname", email = "email2@pyopensci.org" }
]
maintainers = [
  { name = "Secondperson Fullname", email = "email2@pyopensci.org" },
  { name = "New Friend", email = "newbie@pyopensci.org" }
]
readme = "README.md"
license = "MIT"
requires-python = ">=3.10"
Step 4: Specify Dependencies#
Next add your dependencies table to the project table.
The dependencies = section contains a list (or array in the toml language) of the Python packages that your package requires to run properly in a Python environment. Similar to the requirements listed in the [build-system] table above:
[build-system] # <- this is a table
requires = ["hatchling"] # this is an array (or list) of requirements
dependencies are added in an array (similar to a Python list) structure.
dependencies = ["numpy", "requests", "pandas", "pydantic"]
A dependency can be limited to specific versions using a version specifier. If the dependency has no version specifier after the dependency name, your package can use any version of the dependent package. Code changes over time, bugs are fixed, APIs change, and so it’s good to be clear about which version of the dependency you wrote your code to be compatible with - a package you wrote this year probably isn’t compatible with numpy v0.0.1!
Learn more about various ways to specify ranges of package versions here.
The most common version specifier is a lower bound, allowing any version higher than the specified version. Ideally you should set this to the lowest version that is still compatible with your package, but in practice for new packages this is often set at the version that was current at the time the package was written[1].
Lower bounds look like this:
dependencies = [ "numpy>=1.0" ]
Commas are used to separate individual dependencies, and each package in your dependencies section can use different types of version specifiers:
dependencies = [
"numpy>=1.0", # Greater than or equal to 1.0
"requests==10.1", # Exactly 10.1
"pandas", # Any version
"pydantic>=1.7,<2" # Greater than or equal to 1.7, but less than 2
]
Your pyproject.toml file will now look like this:
[build-system]
requires = ["hatchling"]
build-backend = "hatchling.build"

[project]
name = "pyospackage"
version = "0.1.0"
description = """
Tools that update the pyOpenSci contributor and review metadata
that is posted on our website
"""
authors = [
  { name = "Firstname Lastname", email = "email@pyopensci.org"},
  { name = "Secondperson Fullname", email = "email2@pyopensci.org" }
]
maintainers = [
  { name = "Secondperson Fullname", email = "email2@pyopensci.org" },
  { name = "New Friend", email = "newbie@pyopensci.org" }
]
readme = "README.md"
license = "MIT"
requires-python = ">=3.10"
dependencies = ["numpy>=1.0", "requests==10.1", "pandas", "pydantic>=1.7,<2"]
Pin dependencies with caution
“Pinning” a dependency means setting it to a specific version, like this:
numpy == 1.0.
If you are building a library package that other developers will depend upon, you must be cautious before pinning to a precise dependency version. Applications, such as production websites, will often pin their dependencies since other packages will not depend on their project. This is because users will be installing your package into various environments. A dependency pinned to a single specific version can make resolving a Python environment more challenging. As such only pin dependencies to a specific version if you absolutely need to do so.
Similarly, you should be cautious when specifying an upper bound on a package. These two specifications are equivalent:
pydantic>=1.10,<2
pydantic^1.10
One build tool that you should be aware of that pins dependencies to an upper bound by default is Poetry. Read more about how to safely add dependencies with Poetry, here.
Step 5: Add PyPI classifiers#
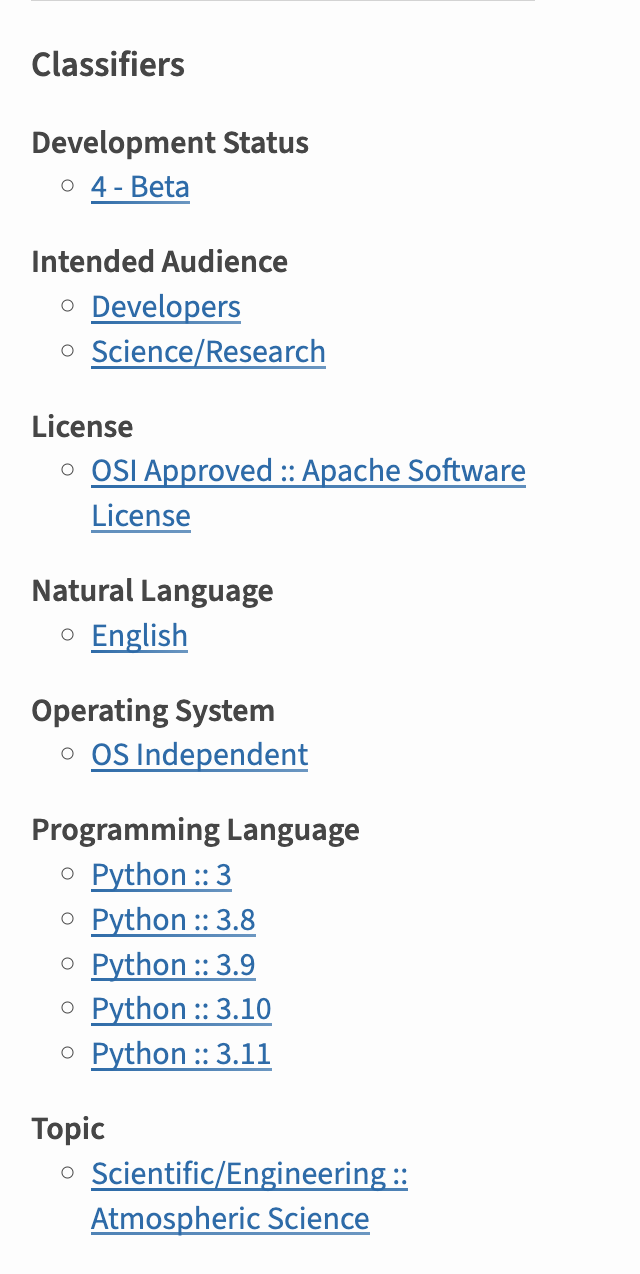
Next you will add classifiers to your pyproject.toml file. The value for each classifier that you add to your pyproject.toml file must come from the list of PyPI accepted classifier values found here. Any deviations in spelling and format will cause issues when you publish to PyPI.
What happens when you use incorrect classifiers?
If you do not use standard classifier values, when you try to publish your package on PyPI it will be rejected. 😔 Don’t worry if PyPI rejects you on your first try! It has happened to all of us.
Review that list and add items below to your pyproject.toml file:
development status
intended audiences
topic
programming language support
The classifier key should look something like the example below. A few notes:
Your classifier values might be different depending upon your intended audience, development status of your package and the Python versions that you support
You can add as many classifiers as you wish as long as you use the designated PyPI classifier values.
[build-system]
requires = ["hatchling"]
build-backend = "hatchling.build"

[project]
name = "pyospackage"
version = "0.1.0"
description = """
Tools that update the pyOpenSci contributor and review metadata
that is posted on our website
"""
authors = [
  { name = "Firstname Lastname", email = "email@pyopensci.org"},
  { name = "Secondperson Fullname", email = "email2@pyopensci.org" }
]
maintainers = [
  { name = "Secondperson Fullname", email = "email2@pyopensci.org" },
  { name = "New Friend", email = "newbie@pyopensci.org" }
]
readme = "README.md"
license = "MIT"
requires-python = ">=3.10"
dependencies = ["numpy>=1.0", "requests==10.1", "pandas", "pydantic>=1.7,<2"]
classifiers = [
"Development Status :: 4 - Beta",
"Intended Audience :: Developers",
"Topic :: Software Development :: Build Tools",
"Programming Language :: Python :: 3 :: Only",
"Programming Language :: Python :: 3.10",
"Programming Language :: Python :: 3.11",
]
Note that while classifiers are not required in your pyproject.toml file, they will help users find your package. As such we strongly recommend that you add them.
Step 6: Add the [project.urls] table#
Finally, add the project.urls table to your pyproject.toml file.
project.urls contains links that are relevant for your project. You might want to include:
Homepage: A link to your published documentation for your project. If you are working through this tutorial, then you may not have this link yet. That’s ok, you can skip it for the time being.
Bug reports: a link to your issues/discussions or wherever you want users to report bugs.
Source: the GitHub / GitLab link for your project.
[build-system]
requires = ["hatchling"]
build-backend = "hatchling.build"

[project]
name = "pyospackage"
version = "0.1.0"
description = """
Tools that update the pyOpenSci contributor and review metadata
that is posted on our website
"""
authors = [
  { name = "Firstname Lastname", email = "email@pyopensci.org"},
  { name = "Secondperson Fullname", email = "email2@pyopensci.org" }
]
maintainers = [
  { name = "Secondperson Fullname", email = "email2@pyopensci.org" },
  { name = "New Friend", email = "newbie@pyopensci.org" }
]
readme = "README.md"
license = "MIT"
requires-python = ">=3.10"

dependencies = ["numpy>=1.0", "requests==10.1", "pandas", "pydantic>=1.7,<2"]
classifiers = [
"Development Status :: 4 - Beta",
"Intended Audience :: Developers",
"Topic :: Software Development :: Build Tools",
"Programming Language :: Python :: 3 :: Only",
"Programming Language :: Python :: 3.10",
"Programming Language :: Python :: 3.11",
]
[project.urls] # Optional
"Homepage" = "https://www.pyopensci.org"
"Bug Reports" = "https://github.com/pyopensci/pyosmeta/issues"
"Source" = "https://github.com/pyopensci/pyosmeta/"
Tip
There are many other urls that you can add here. Check out the README file here for an overview.
Putting it all together - your completed pyproject.toml file#
Below is an example of a complete pyproject.toml file that
is commented with all of the sections we discussed above.
[build-system]
requires = ["hatchling"]
build-backend = "hatchling.build"

[project]
name = "pyospackage"
version = "0.1.0"
description = """
Tools that update the pyOpenSci contributor and review metadata
that is posted on our website
"""
authors = [
  { name = "Firstname Lastname", email = "email@pyopensci.org"},
  { name = "Secondperson Fullname", email = "email2@pyopensci.org" }
]
maintainers = [
  { name = "Secondperson Fullname", email = "email2@pyopensci.org" },
  { name = "New Friend", email = "newbie@pyopensci.org" }
]
readme = "README.md"
license = "MIT"
requires-python = ">=3.10"

dependencies = ["numpy>=1.0", "requests==10.1", "pandas", "pydantic>=1.7,<2"]

classifiers = [
    "Development Status :: 4 - Beta",
    "Intended Audience :: Developers",
    "Topic :: Software Development :: Build Tools",
    "Programming Language :: Python :: 3 :: Only",
    "Programming Language :: Python :: 3.10",
    "Programming Language :: Python :: 3.11",
]
[project.urls] # Optional
"Homepage" = "https://www.pyopensci.org"
"Bug Reports" = "https://github.com/pyopensci/pyosmeta/issues"
"Source" = "https://github.com/pyopensci/pyosmeta/"
Appendix - Click for a fully commented pyproject.toml file
Below is a fully commented pyproject.toml file if you want to use it for reference.
# You can delete all of the comments once you have created your own pyproject.toml file.

# The build system table. Here we use hatchling as the build back end tool.
[build-system]
requires = ["hatchling"]
build-backend = "hatchling.build"

# The [project] section contains your package's metadata
# notice that the version is setup to be dynamically generated using dynamic=[“version”]

[project]
name = "pyospackage"
# dynamic = ["version"] # you will learn how to dynamically set the version in a future lesson
version = "0.1.0" # manually assign version (not preferred)
description = "Tools that update the pyOpenSci contributor and review metadata that is posted on our website"
authors = [{ name = "Firstname lastname", email = "email@pyopensci.org" }]

# maintainers section is optional but suggested.
maintainers = [
    { name = "firstname lastname", email = "admin@pyopensci.org" }, # Optional
]

# Classifiers have set values - be sure to only use classifier values from the
# PyPI page here: https://PyPI.org/classifiers/

classifiers = [
    # How mature is this project? Common values are
    #   3 - Alpha
    #   4 - Beta
    #   5 - Production/Stable
    "Development Status :: 4 - Beta",

    # Indicate who your project is intended for
    "Intended Audience :: Developers",
    "Topic :: Software Development :: Build Tools",

    # Specify the Python versions ensuring that you indicate you support Python 3.
    # this is only for PyPI and other metadata associated with your package - for your users to see
    "Programming Language :: Python :: 3 :: Only", # BE sure to specify that you use python 3.x
    "Programming Language :: Python :: 3.10",
    "Programming Language :: Python :: 3.11",
]


dependencies = ["numpy>=1.0", "requests==10.1", "pandas", "pydantic>=1.7,<2"]
# This is the metadata that pip reads to understand what versions your package supports
requires-python = ">=3.10"
readme = "README.md"

# Pick your license using the license expression syntax specified here:
# https://packaging.python.org/en/latest/specifications/license-expression/
# We suggest MIT, BSD-3-Clause or Apache-2.0
license = "MIT"

# Add urls for your home page, issue tracker and source code
[project.urls] # Optional
"Homepage" = "https://www.pyopensci.org"
"Bug Reports" = "https://github.com/pyopensci/pyospackage/issues"
#"Funding" = ""
"Source" = "https://github.com/pyopensci/pyospackage"
Example pyproject.toml files#
Below are some examples of pyproject.toml files from various packages in the scientific and pyOpenSci ecosystem.
Wrap up#
At this point you’ve created:
A README.md file for your package
A CODE_OF_CONDUCT.md file to support your user community
And a LICENSE file which provides legal boundaries around how people can and can’t use your software
You also learned how to publish your package to (test)PyPI.
Publish a new version of your package to PyPI#
You are now ready to publish a new version of your Python package to (test) PyPI. When you do this you will see that the landing page for your package now contains a lot more information.
Try to republish now.
First, update the version of your package in your pyproject toml file. Below version is updated from
0.1 to 0.1.1.
[build-system]
requires = ["hatchling"]
build-backend = "hatchling.build"

[project]
name = "pyospackage"
version = "0.1.1"
Now use hatch to publish the new version of your package to test.PyPI.org.
> hatch publish -r test
Next (optional) step - publishing to conda-forge#
You now have all of the skills that you need to publish your package to PyPI.
If you also want to publish your package on conda-forge (which is a channel within the conda ecosystem), you will learn how to do that in the next lesson.