Add a LICENSE & CODE_OF_CONDUCT to your Python package#
In the previous lesson you:
Created a basic README.md file for your scientific Python package
Learned about the core components that are useful to have in a README file.
Learning objectives
In this lesson you will learn:
How to select a license and add a
LICENSEfile to your package repository, with a focus on the GitHub interface.How to add a
CODE_OF_CONDUCTfile to your package repository.How you can use the Contributors Covenant website to add generic language as a starting place for your
CODE_OF_CONDUCT.
What is a license?#
A license contains legal language about how users can use and reuse your software. To set the LICENSE for your project, you:
Create a
LICENSEfile in your project directory that specifies the license that you choose for your package.Describe your choice of license in your
pyproject.tomldata where metadata are set.
By adding this metadata to your pyproject.toml file, the choice of
license will be included in your package’s metadata which is used to populate
your package’s PyPI landing page. The LICENSE file is also used in your
GitHub repository’s landing page interface, and makes its way into your distributions.
What license should you use?#
We suggest that you use a permissive license that accommodates the other most commonly used licenses in the scientific Python ecosystem (MIT[1] and BSD-3-Clause[2]). If you are unsure, use MIT given it’s the generally recommended license on choosealicense.com.
Licenses for the scientific Python ecosystem
We discuss licenses for the scientific Python ecosystem in more detail here in our guidebook.
Where should the LICENSE file live#
Your LICENSE file should be placed at the root of your package’s repository.
When you add the LICENSE at the root, GitHub will automagically discover it and
provide users with a direct link to your LICENSE file within your GitHub
repository.

Notice at the top of the
README portion of the GitHub landing page, there are three tabs directly linking to the README file which is visible, the CODE_OF_CONDUCT file and one that specifies
the license that SunPy uses. These files are discovered by GitHub because they
are placed in the root of the project directory using standard naming conventions.#
How to add a LICENSE file to your package directory#
There are several ways to add a LICENSE file:
When you create a new repository on GitHub, it will ask you if you wish to add a
LICENSEfile at that time. If you select yes, it will create the file for you.You can add a
LICENSEthrough the GitHub gui following the instructions here.You can add the file manually as we are doing in this lesson.
Tip
If you completed the past lessons including
then you already have a LICENSE file containing text for the MIT license in your Python package. Thus you can skip to the next section of this tutorial which walks you through adding a CODE_OF_CONDUCT.
If you don’t yet have a LICENSE file in your directory, then continue reading.
How to add a LICENSE to your package - the manual way#
If you don’t already have a LICENSE file, and you are not yet using a platform such as GitHub or GitLab, then you can create a LICENSE file by
Create a new file called
LICENSE. If you are using shell you can type:
# Create a `LICENSE` file in your shell
> touch LICENSE
Go to choosealicense.com
Select permissive license
It will suggest that you use the MIT license.
Copy the license text that it provides into your
LICENSEfile that you created above.Save your file. You’re all done!
An overview of licenses in the scientific Python ecosystem
In the pyOpenSci packaging guidebook, we provide an overview of licenses in the scientific Python ecosystem. We review why license files are important, which ones are most commonly used for scientific software and how to select the correct license.
If you want a broad overview of why licenses are important for protecting open source software, check out this blog post that overviews the legal side of things.
Instructions for adding a LICENSE file within the GitHub interface
When you create a new GitHub repository you can add a LICENSE file
through the GitHub interface.
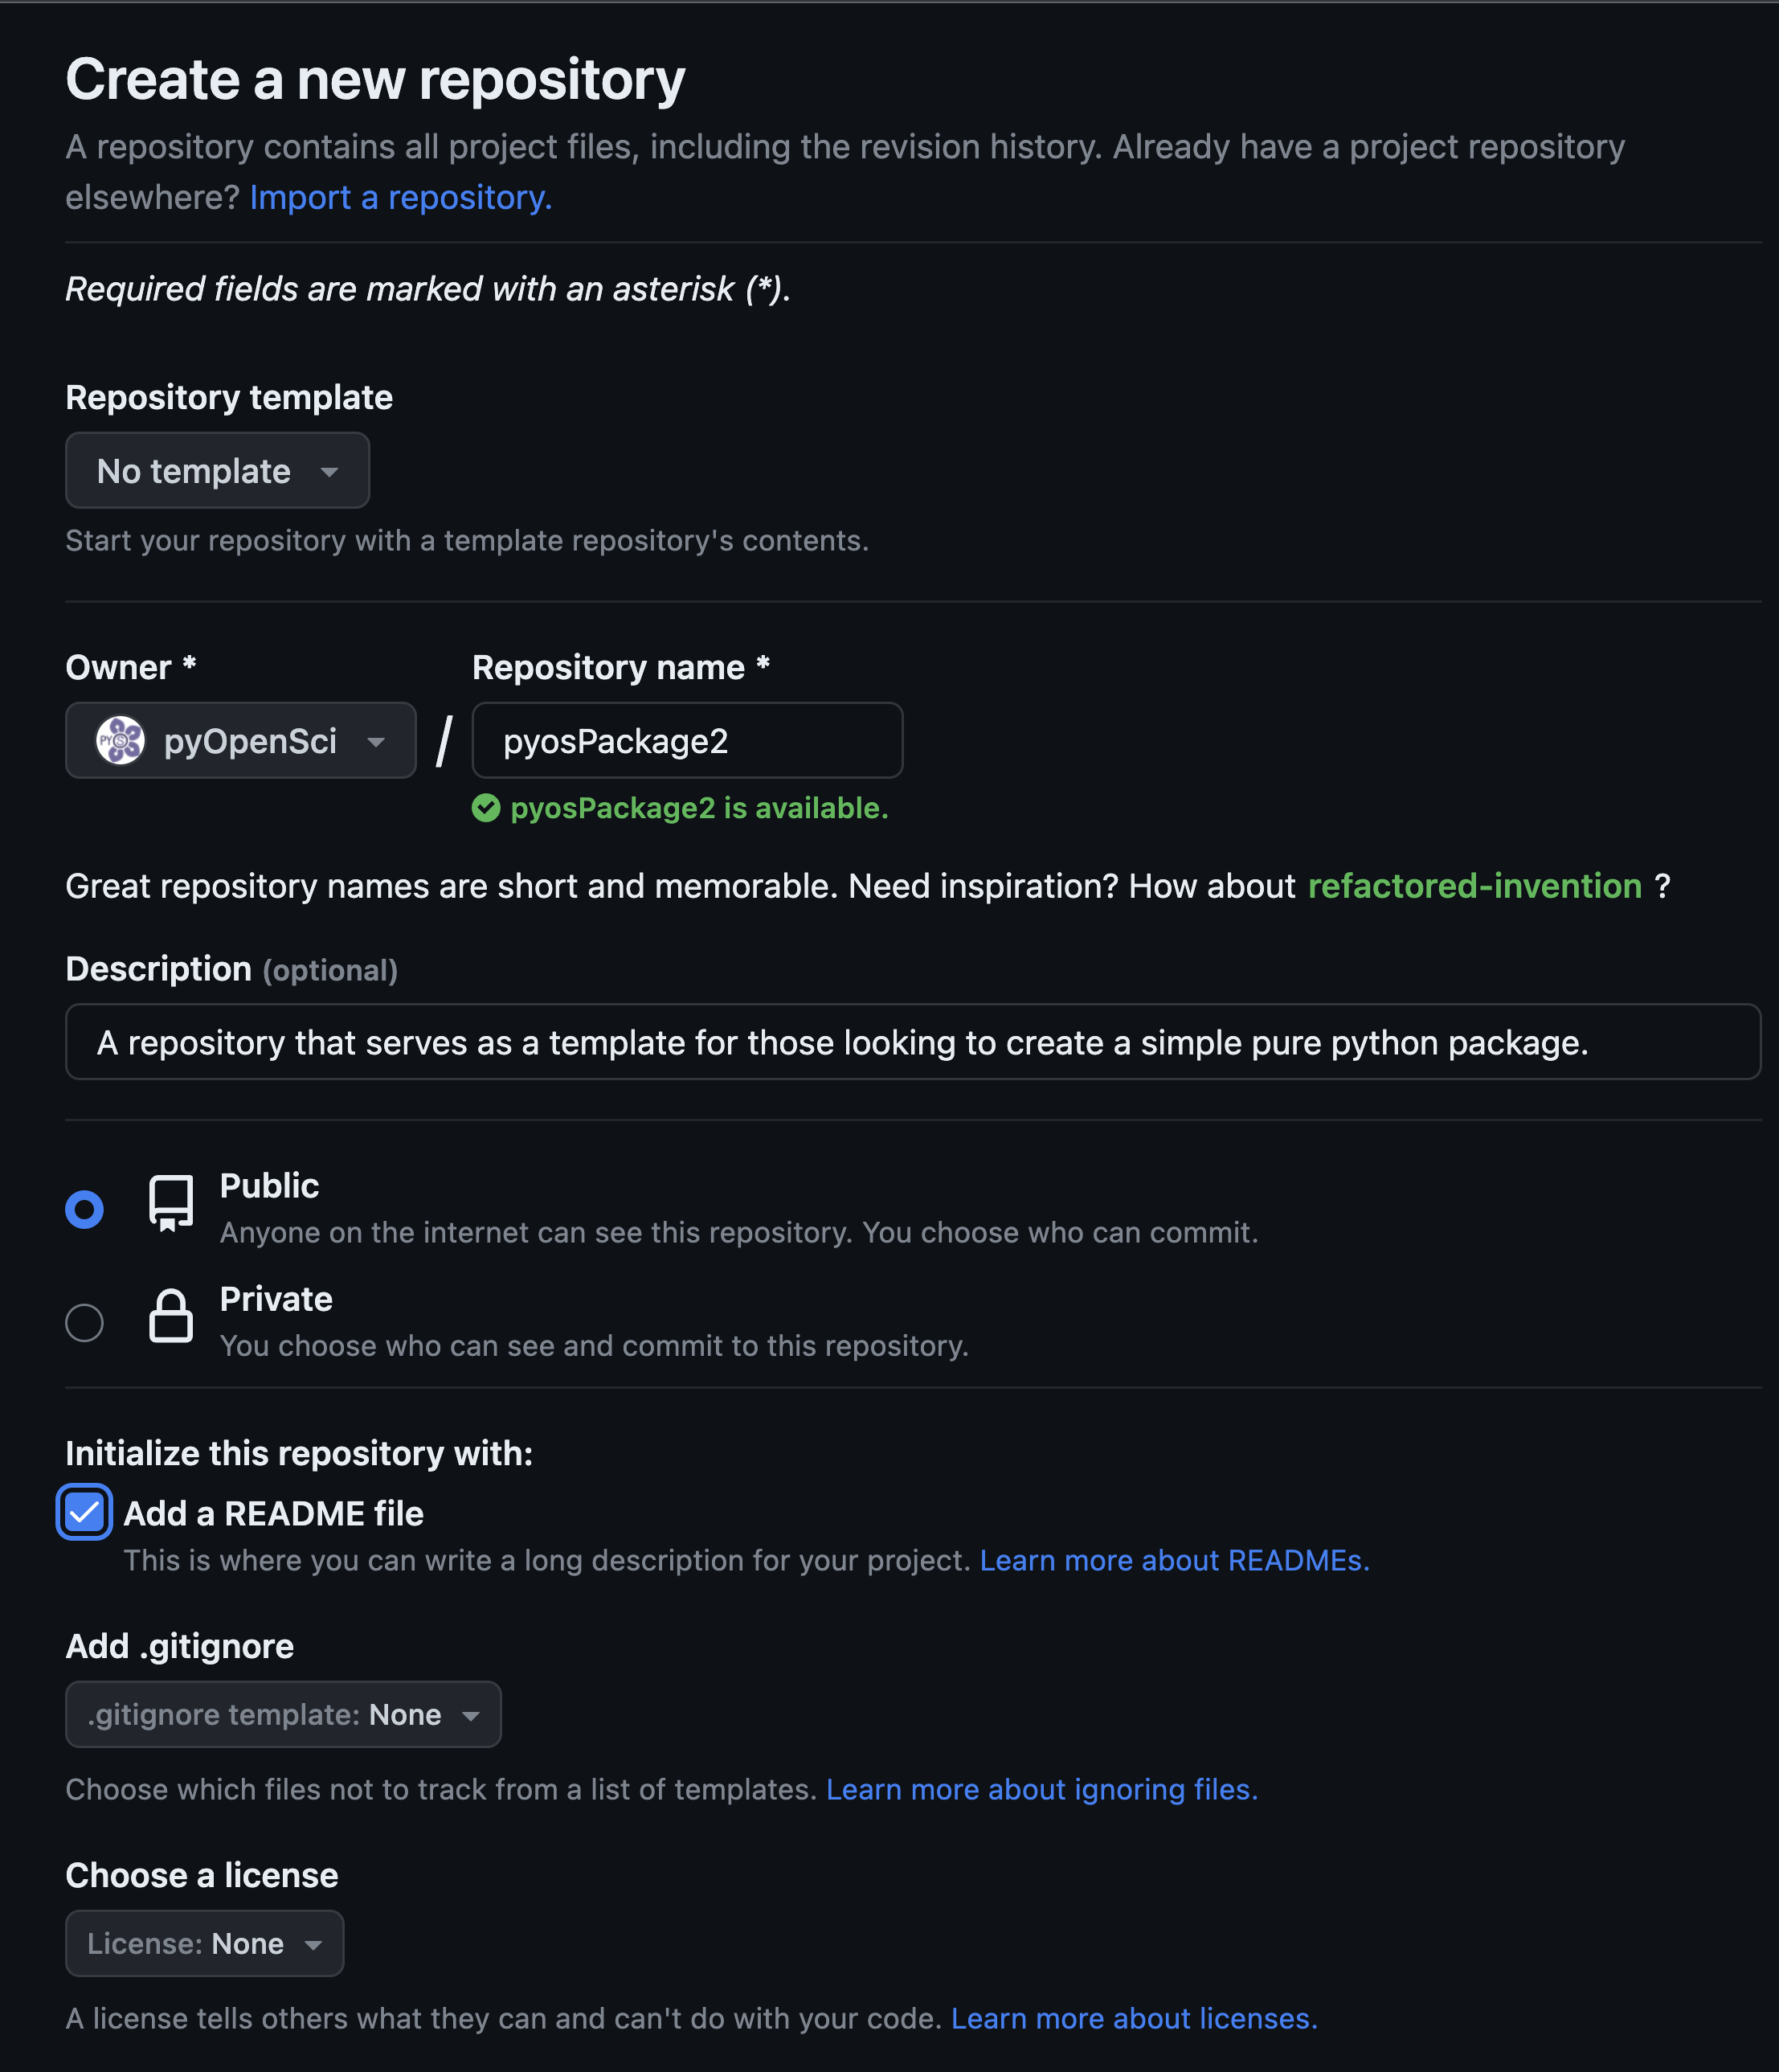
Image showing the GitHub interface that allows you to add a LICENSE and README file when you create a new repository.#
If you already have a GitHub repository for your package, then you can add a LICENSE using the GitHub interface by adding a new file to the repository.
Follow the instructions to select and add a license to your repository on the GitHub LICENSE page .
Once you have added your
LICENSEfile, be sure to sync your git local repository with the repository on GitHub.com. This means runninggit pullto update your local branch.
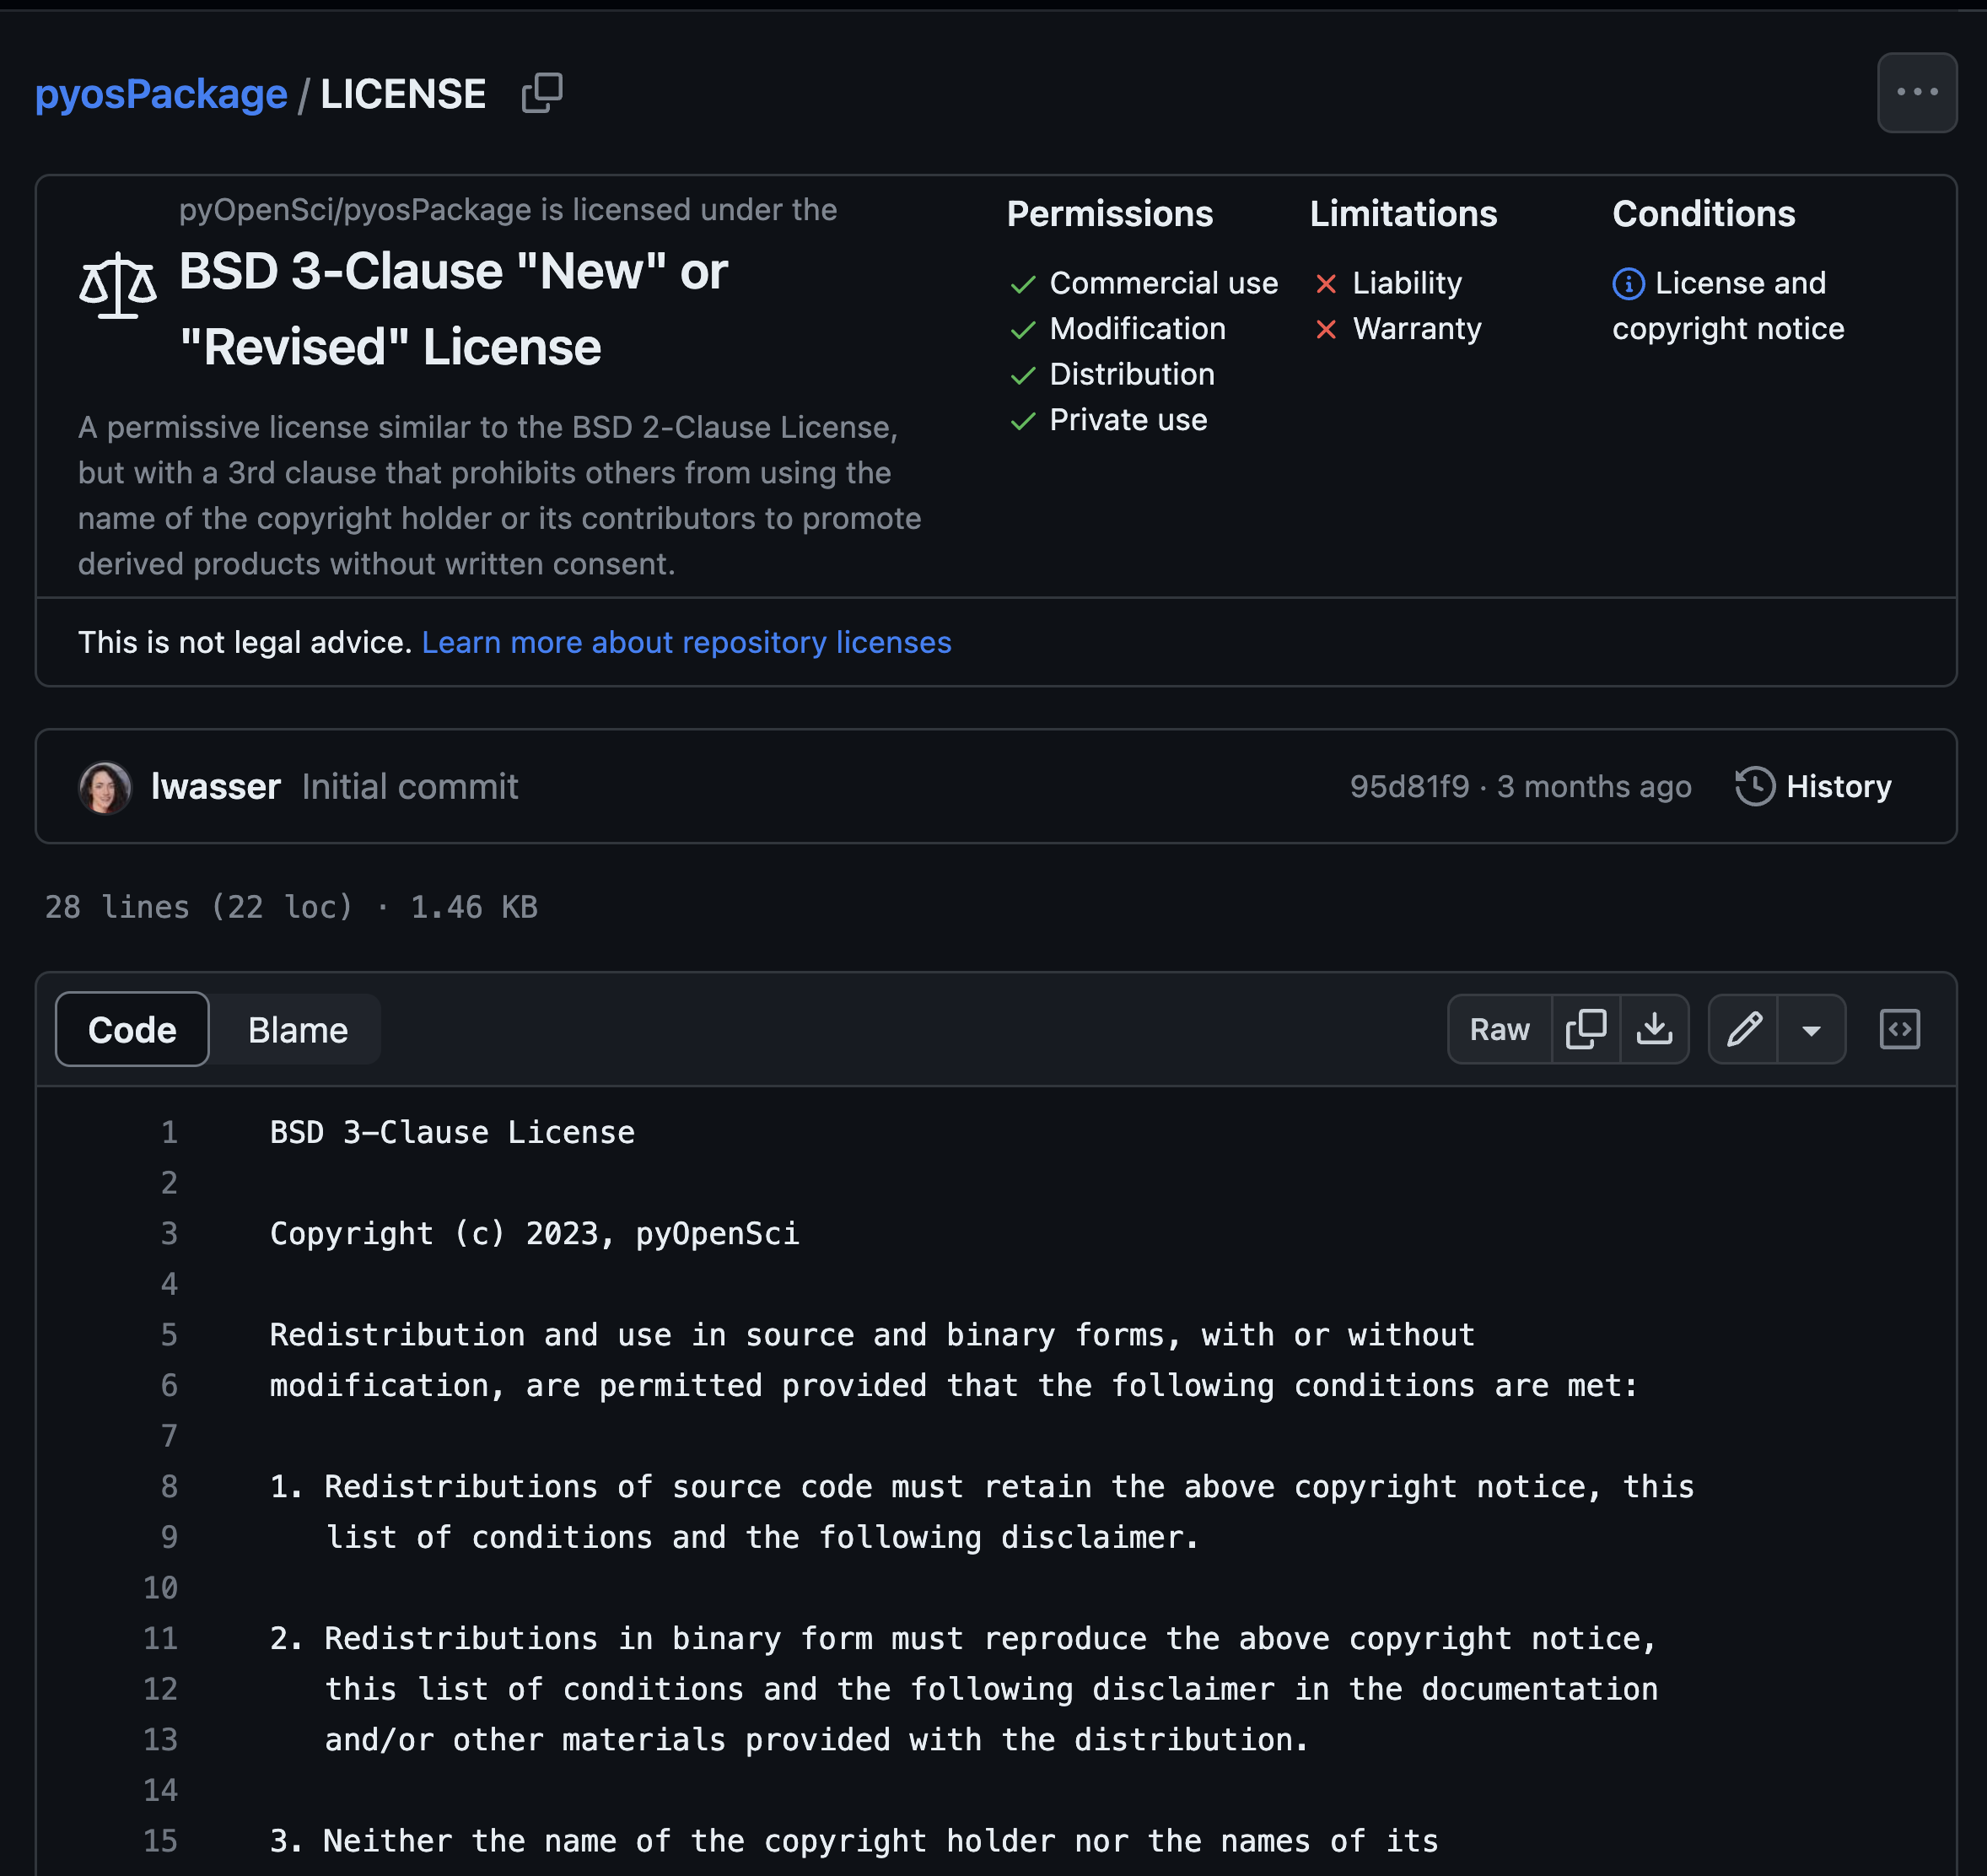
You can view a summary of the LICENSE chosen on your project’s
GitHub landing page.#
Now you know how to add a LICENSE to your project. Next, you’ll learn
about the CODE_OF_CONDUCT.md file and how to add it to your
package directory.
What is a code of conduct file?#
A CODE_OF_CONDUCT file is a Code of conduct used to establish
guidelines for how people in your community interact.
This file is critical to supporting your community as it
grows. The CODE_OF_CONDUCT:
Establishes guidelines for how users and contributors interact with each other and you in your software repository.
Identifies negative behaviors that you don’t want in your interactions.
You can use your code of conduct as a tool that can be referenced when moderating challenging conversations.
What to put in your CODE_OF_CONDUCT file#
If you are unsure of what language to add to your CODE_OF_CONDUCT
file, we suggest that you adopt the contributor covenant language as a starting place.
![]()
The CODE_OF_CONDUCT.md should be placed at the root of your project directory, similar to the LICENSE file.
How to add a CODE_OF_CONDUCT file to your package directory#
Add a
CODE_OF_CONDUCT.mdfile to the root of your repository if it doesn’t already exist.
> touch CODE_OF_CONDUCT.md
Visit the contributor covenant website and add the markdown version of their code of conduct to your
CODE_OF_CONDUCT.mdfile. Be sure to fill in any placeholder information. Read the text closely to ensure you both understand it and also agree with its contents!
That’s it - you’ve now added a code of conduct to your package directory.
Additional Code of Conduct resources
Wrap up#
In this lesson and the last lesson, you have added a:
READMEfile;LICENSEfile and aCODE_OF_CONDUCTfile.
These are fundamental files needed for every scientific Python package repository. These files help users understand how to use your package and interact with package maintainers.
In the upcoming lessons, you will:
Add more metadata to your
pyproject.tomlfile to support building and publishing your package on PyPI.Publish a new version of your Python package to the test PyPI to preview the updated metadata landing page.